
If you want to add new features to your WordPress site, plugins are your best friend. In most cases, it only takes a few clicks right from your dashboard. This one skill is the key to unlocking the full potential of WordPress, letting you transform a simple blog into a full-blown online store, a membership hub, or pretty much anything else you can dream up.

Why Plugins Are Such a Big Deal
Before getting into the how, let's talk about the why. Think of plugins like apps for your phone. They are little bundles of code that add specific functions to your website, turning a standard WordPress setup into a custom tool built just for you.
Learning to install plugins isn't just about following steps; it’s about taking complete control over what your website can do. With the right set of plugins, you can:
- Climb the Google Rankings: Use a plugin to fine-tune your SEO and make your content more visible.
- Build Your Audience: Add a form builder to create contact forms, surveys, or email sign-ups.
- Launch an Online Store: Integrate a full-featured e-commerce system to sell products or services.
The official WordPress Plugin Directory is where you'll find over 60,000 free plugins ready to go. Knowing how to navigate this ecosystem is essential, even for handling important legal requirements like ensuring GDPR compliance for WordPress.
This massive library of tools is what makes WordPress so powerful. The WordPress plugin market was valued at $1.32 billion in 2023 and is expected to hit $1.56 billion by 2031.
Learning how to properly add plugins is a foundational skill for anyone running a WordPress site. If the whole concept is new to you, it might be worth checking out our guide on https://onenine.com/what-is-plugin-in-website/ for a bit more background.
Installing Plugins Directly From Your WordPress Dashboard
For most folks, the simplest way to add new features to a WordPress site is right from the dashboard. There's no need for any technical wizardry—everything you need is built directly into the admin area, giving you access to the entire official WordPress Plugin Directory.
To get started, just look for the Plugins tab in your left-hand menu and click Add New. This little corner of your website is the gateway to thousands of free tools.
Finding and Installing the Right Plugin
Once you land on the "Add New Plugin" page, you'll spot a search bar on the right. This is where the fun begins. Let's say you want to sharpen up your site's SEO. A fantastic and widely-used option is Yoast SEO, so you'd simply type that into the search box.
WordPress will instantly pull up a list of matching plugins, displayed in a neat, card-style format. Each card is packed with crucial information, letting you do a quick background check before you commit.
Here’s exactly what that search results page looks like.
Before you go any further, take a moment to look at the details on the plugin's card. Those little metrics—the star rating, active installations, and last updated date—are your best friends for avoiding a bad plugin.
When you're sifting through search results, it pays to be a little picky. A plugin can look great on the surface, but a few key details will tell you the real story. I've put together a quick table to help you vet plugins like a pro, right from the search page.
Vetting Plugins at a Glance
| Metric to Check | What It Tells You | What to Look For |
|---|---|---|
| Last Updated | Is the developer actively maintaining the plugin? | Look for updates within the last few months. Anything over a year old is a potential red flag. |
| Active Installations | How many other websites trust and use this plugin? | High numbers are a good sign. For Yoast, it's over 5+ million, which speaks volumes about its reliability. |
| Reviews & Ratings | What are other users' experiences with it? | A high average star rating (4 stars or more) from a decent number of reviews is what you want to see. |
| Tested With | Is it compatible with your version of WordPress? | Make sure it’s compatible with the current version you're running to avoid conflicts. |
These simple checks take just a few seconds but can save you from a world of headaches down the road.
Once you’ve found a winner, click the Install Now button. WordPress takes care of all the behind-the-scenes work. After a moment, that button will turn into a blue Activate button.
Give it a click, and you're all set! Just remember, a plugin doesn't do anything until you activate it.
What About Premium Plugins? Uploading a ZIP File
So, what happens when you buy a premium plugin from a marketplace like CodeCanyon or directly from a developer? It almost always comes as a ZIP file. This is where knowing how to manually upload a plugin is a skill you'll use time and time again.
It's actually just as easy as using the official directory. You'll start in the same place: head over to Plugins > Add New. But this time, instead of using the search bar, look for the Upload Plugin button right at the top of the page.
Getting Your Plugin Uploaded and Running
Clicking that button will open up a simple file uploader. Now, just find the plugin's ZIP file that you downloaded to your computer and select it.
Here’s a common trip-up: don’t unzip the file first! WordPress is built to handle the entire compressed file as is. Just upload the original ZIP.
After you select the file, hit Install Now. WordPress will do all the heavy lifting—unpacking the file and putting everything where it needs to go. Once it’s done, you'll see a success screen. The final step is to click the Activate Plugin button, and you're good to go.
My Two Cents: I keep a dedicated folder on my computer just for my premium plugin ZIP files. It’s a simple organizational habit that saves me from digging through a messy downloads folder whenever I need to reinstall something.
Learning how to handle a ZIP file upload opens the door to a whole new world of functionality. While the official directory has over 59,000 free plugins, many of the most powerful tools—think specialized e-commerce add-ons or advanced membership features—are premium and come as a direct download.
Given that WordPress powers 43.2% of all websites, knowing this simple upload process is essential for anyone serious about building a high-quality site. You can get a better sense of just how important plugins are by checking out some of the latest WordPress statistics.
Ultimately, this method gives you the freedom to use any plugin from any source, putting you in complete control of what your website can do.
The Power User's Method: Using FTP to Install a Plugin
Sometimes, the standard installation methods just aren't an option. What if a buggy plugin locks you out of your admin dashboard, leaving you with the dreaded "white screen of death"? In situations like that, knowing how to install (or remove) a plugin using FTP is a genuine lifesaver.
Think of FTP (File Transfer Protocol) or its secure cousin, SFTP, as a backdoor key to your website's file system. It lets you bypass the WordPress dashboard entirely and manage files directly on your server. You’ll need an FTP client, like the popular and free FileZilla, along with credentials from your hosting provider.
While it's a more technical approach, it's an essential skill for troubleshooting tricky situations.
The FTP Upload Process
First, you'll need to connect to your server using the FTP credentials your host provides. Once you're in, you'll see the raw file structure of your WordPress installation.
Your destination is the main plugin directory, which is always located at wp-content/plugins. Now, here's the crucial difference from the dashboard upload: you must unzip the plugin file on your local computer first.
After you've extracted the plugin's folder, simply drag it from your desktop into the /plugins directory within your FTP client. Once the upload is complete, head back to your WordPress admin dashboard (assuming you can access it), and you’ll find the new plugin waiting in your list, ready to be activated.
This simple flowchart breaks down the manual installation process.
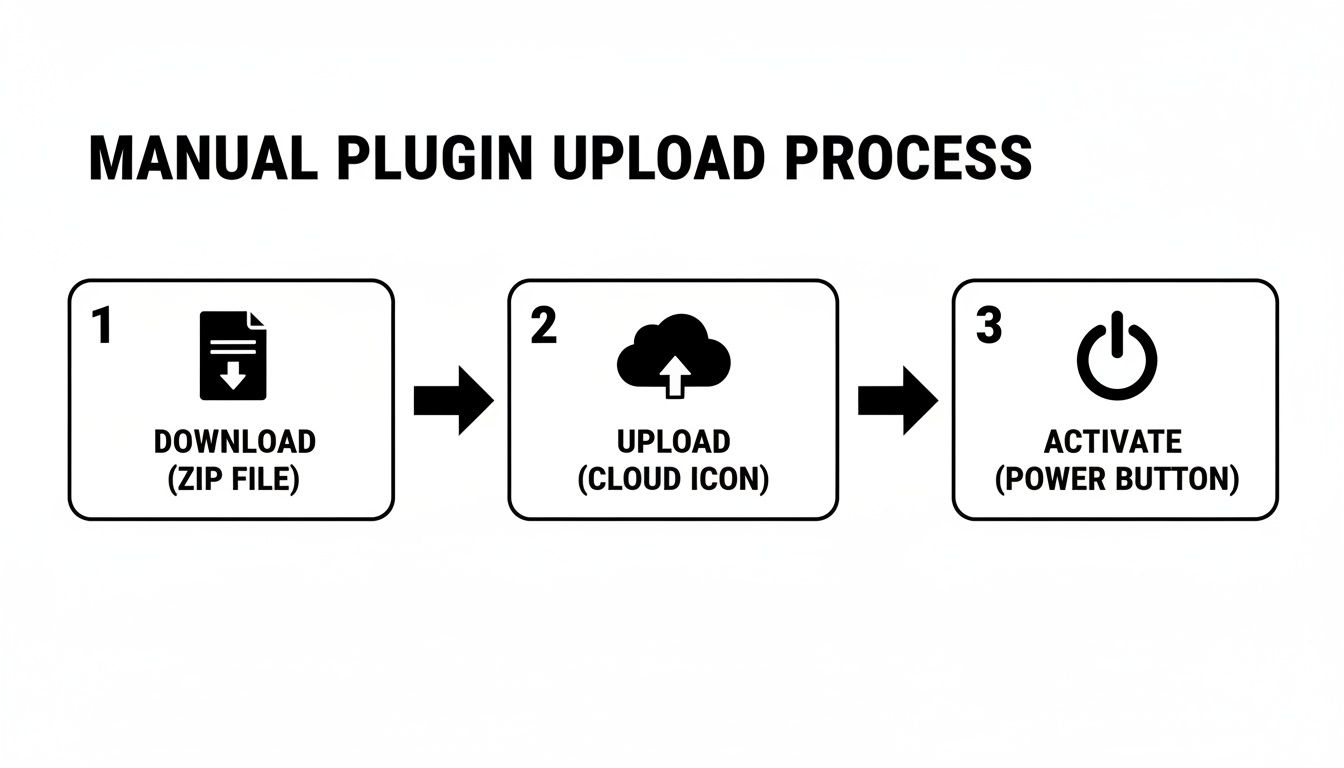
As you can see, it boils down to three core actions: download the plugin, upload its folder, and then activate it inside WordPress.
FTP is your emergency toolkit. It's the most direct installation method, giving you full control when the dashboard is off-limits. It's also the exact same process you'd use to delete a misbehaving plugin to get your site back online.
Because you're working directly with server files, this method does come with a bit more risk if you aren't careful. For many business owners, it’s easier to rely on professional website hosting and management to handle these backend tasks. That way, you get the peace of mind knowing your site is in good hands and running perfectly.
Tackling Common Plugin Installation Problems
Even with a process this simple, things can occasionally go sideways. Installing a plugin is one thing, but knowing how to troubleshoot when an installation goes wrong is what separates the pros from the beginners. If you hit a roadblock, don't panic—most plugin errors are well-documented and have a clear path to a fix.
It's a numbers game, really. WordPress dominates the CMS market, holding a staggering 62.8% market share, largely because of its incredible flexibility through plugins. With giants like Jetpack and Wordfence each boasting over 5 million active installations, it's easy to see how conflicts can arise on a site running multiple add-ons. You can dive deeper into these numbers with these fascinating WordPress statistics from DiviFlash.
Common Installation Errors and How to Fix Them
Let's walk through some of the usual suspects you might encounter.
The White Screen of Death
This one is alarming. You activate a new plugin, and suddenly, your entire site is just a blank white page. This almost always points to a major code conflict, usually between the new plugin and your theme or another plugin.
The quickest way to get your site back is to use FTP or your host's File Manager. Navigate to the /wp-content/plugins directory and simply rename the folder of the plugin you just activated. This deactivates it instantly and should restore your site.
Memory Limit Errors
Sometimes you'll see a message like "Fatal error: Allowed memory size of… exhausted." This just means the plugin needs more server resources to run than your current hosting plan provides.
The fix for this one is pretty simple. You'll need to contact your hosting provider and ask them to increase your site's PHP memory limit. It's a common request, and they should be able to handle it for you in just a few minutes.
"Destination Folder Already Exists"
This error is another common one. It usually pops up if a previous attempt to install the same plugin failed but left an empty folder behind. WordPress sees the folder and stops the installation to avoid overwriting anything.
To solve it, you'll have to log in via FTP again, find that empty plugin folder in your /wp-content/plugins directory, and delete it. Once it's gone, you can head back to your dashboard and try the installation again.
For a more comprehensive look at sorting out these kinds of issues, our guide on the 7 steps to fix plugin conflicts is a great resource.
Got Questions? We’ve Got Answers.
Even with a clear guide, a few questions always seem to surface when you start adding plugins. Let's tackle some of the most common ones I hear from people just getting started with WordPress.
How Many Plugins Is Too Many?
This is a classic question, but there’s no magic number. It's not about the quantity of your plugins; it's all about their quality. I’ve seen sites with 50+ well-coded plugins run faster than sites with 10 poorly built ones.
The real culprit behind a slow site is often just one or two resource-hungry or poorly maintained plugins. Focus on adding only what you truly need from developers you trust. If a plugin isn't adding critical value, it's just dead weight.
Can a Plugin Actually Break My Website?
Yes, absolutely. It's not a common occurrence, but it can happen. A plugin might not play nice with your theme, clash with another plugin, or simply be incompatible with your version of WordPress. This is precisely why it’s so important to do your homework—check the "Last updated" date, user reviews, and active installation count before you click install.
My number one piece of advice? Always, always back up your website before adding a new plugin. A solid backup is your ultimate undo button, letting you restore your site in minutes if something goes sideways.
What's the Difference Between Installing and Activating?
Think of it like this: installing is like downloading an app onto your phone. The files are there, sitting on your server, but they aren't doing anything yet.
Activating is what flips the switch and turns it on. This step executes the plugin's code, integrating its features into your website. A plugin has to be both installed and activated to actually work.
Are Free Plugins Safe to Use?
They definitely can be, provided you get them from the right place. The official WordPress Plugin Directory is your safest bet. Every single plugin listed there goes through a review process before it’s made public.
Where you run into trouble is downloading free plugins from random third-party sites. Those can be a Wild West of shoddy code or, even worse, malware. Stick to the official directory or the plugin developer's own website, and you’ll be in good shape.
Juggling everything on the backend—from installing plugins to fixing unexpected errors—can feel like a full-time job. At OneNine, we take that work off your plate with expert development and support. You can get back to focusing on your business while we handle the technical side of things. See how we can help at https://onenine.com.


