

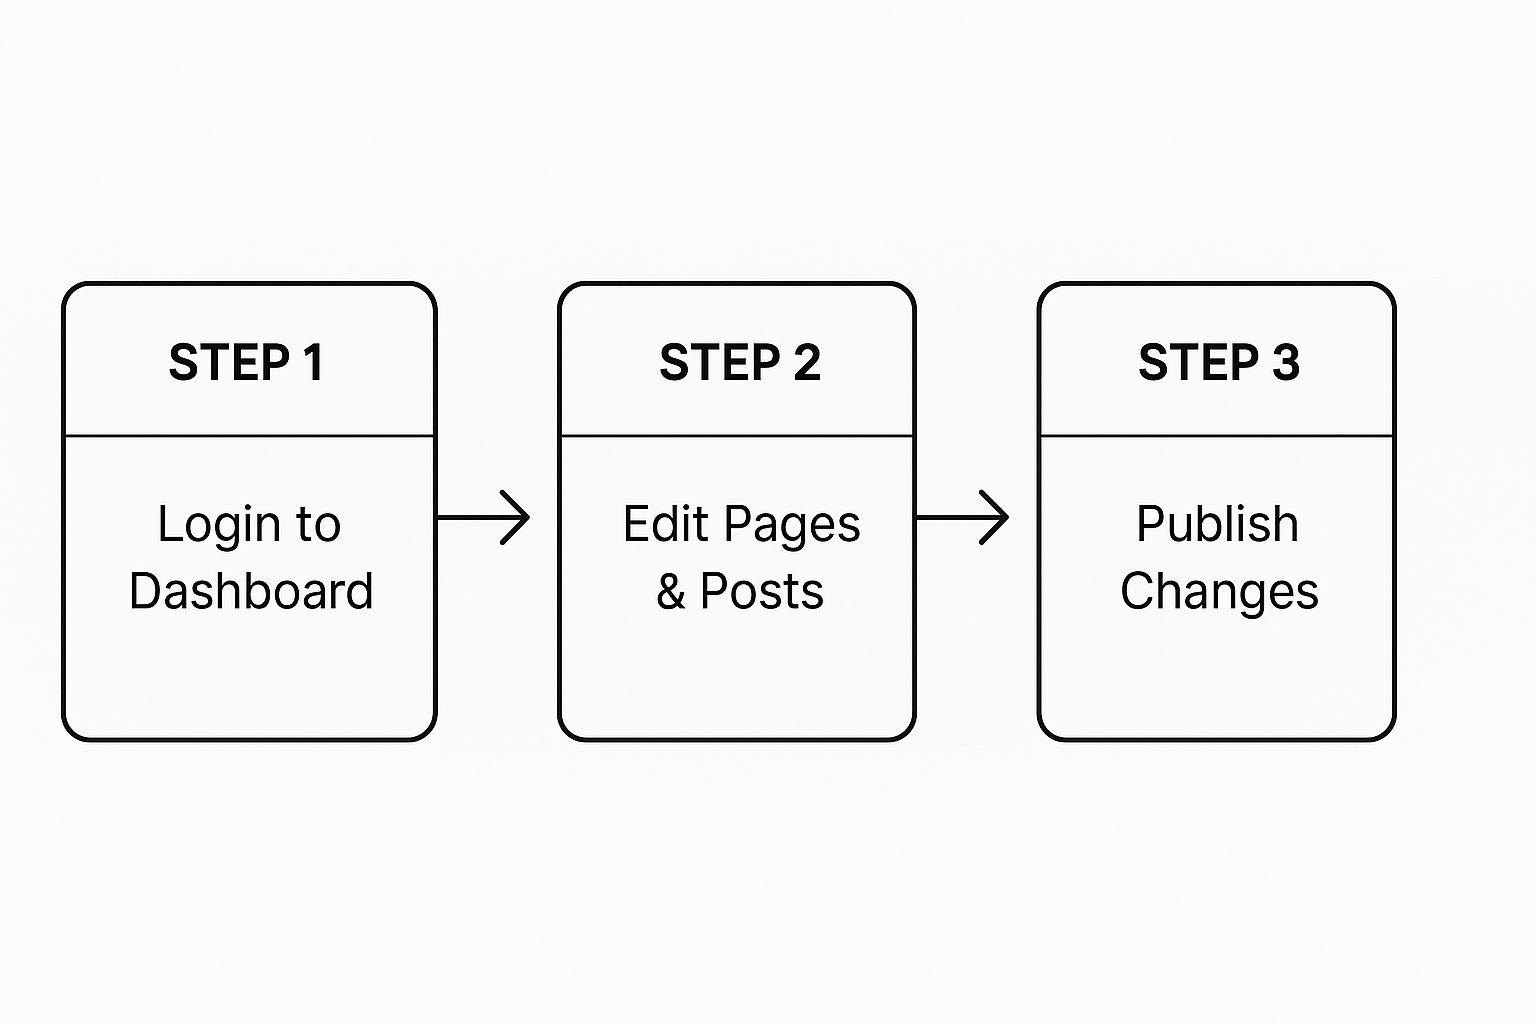
Making changes to your WordPress website is probably easier than you think. The whole process begins in the WordPress dashboard, which is essentially your site's control room. From here, you'll log in, find the content you want to edit, make your changes, and push them live for the world to see.
Navigating the WordPress Dashboard Like a Pro
Before you can tweak a single word, you need to get your bearings inside your website's command center. The WordPress dashboard is where every edit, update, and new piece of content originates. I like to think of it as the backstage of a theater—your visitors see the polished final performance, but you're the one with access to all the controls that make the show happen.
One of the best things about learning WordPress is just how many people use it. As of mid-2025, WordPress powers an incredible 43.6% of all websites that use a known content management system (CMS). That gives it a whopping 63% of the total CMS market share. This massive community means you're never truly alone; there are countless resources and forums out there if you get stuck. You can find more fascinating stats about the WordPress market share over on Invedus.com.
Getting Familiar With the Main Menu
First things first, you need to log in. You can almost always do this by navigating to yourwebsite.com/wp-admin. Once you're in, you’ll see a dark vertical menu on the left side of your screen. This is your mission control.
Here’s a look at what a standard WordPress dashboard looks like right after you log in. The main menu on the left is your key to everything.
It can look like a lot at first, but don't let all the options intimidate you. For day-to-day edits, you'll likely spend 90% of your time in just a few spots: Posts, Pages, and maybe Media for images.
The Core Difference: Posts vs. Pages
One of the first hurdles for anyone new to WordPress is figuring out the difference between a Post and a Page. It seems small, but getting this right from the start is crucial for keeping your site organized and easy for visitors to navigate.
In my experience, this is the simplest way to think about it:
- Posts are for timely content. Think blog articles, company news, or event announcements. They are organized by date, and you can sort them with categories and tags.
- Pages are for your static, "evergreen" content. This is stuff that doesn't change often, like your 'About Us', 'Services', or 'Contact' pages.
To make it even clearer, here's a quick reference table.
WordPress Content Types at a Glance
Use this quick comparison to decide whether your new content should be a Post or a Page.
| Content Type | Best Used For | Key Characteristics |
|---|---|---|
| Post | Blog articles, news updates, press releases | Published chronologically, can use categories & tags |
| Page | About Us, Contact, Services, Privacy Policy | Static content, not tied to a date, can be hierarchical |
So, if you're writing a weekly update, it’s a Post. If you're adding a permanent page explaining your company's history, that’s a Page. Simple as that.
Getting comfortable with the dashboard is your first and most important step. Once you know your way around, you'll be ready to make meaningful changes to your website's content and appearance, turning it from a simple online brochure into a powerful business asset.
Making Changes to Your Pages and Posts
Okay, this is where the real work begins—editing your actual content. After you've gotten comfortable with the dashboard, the next big thing to learn is the WordPress Block Editor. You might also hear it called Gutenberg.
Think of it like playing with digital LEGOs. Every piece of your page—a paragraph, a picture, a button, a video—is its own separate "block." This is a huge advantage because it lets you move things around, add new sections, and build complex layouts without needing to know a single line of code.
Let’s run through a common scenario. Say you need to update your "Services" page because the text is a little stale and you want to swap out an old project photo for a new one. This is a classic website edit. You’d just head to Pages > All Pages from your dashboard, find "Services" in the list, and click on it to jump into the editor.
Working with Content Blocks
Once you're in the editor, you'll see your page laid out as a series of these content blocks. Editing text is as easy as clicking on a paragraph and typing. If you want to add something new, just look for the little blue or black plus icon (+) to open up a library of all the available blocks.
So, for that "Services" page refresh, here’s what you might do:
- Add a New Heading: Hit the plus icon, search for the "Heading" block, and pop it in. Then you can type something like, "Our Updated Service Offerings."
- Swap an Image: Simply click on the image you want to replace. A small toolbar will appear right above it. Click the "Replace" button, and you can either upload a new file from your computer or pick an existing one from your Media Library.
- Embed a Video: Have a great new client testimonial on YouTube? Just copy the video’s URL and paste it onto a new line in the editor. WordPress is smart enough to see the link and will automatically create a "YouTube" block to embed it for you. It’s that simple.
The block system is one of the main reasons WordPress is so popular. It powers over 532 million websites, which is a staggering 43.4% of the entire web. Among sites that use a CMS, its market share jumps to 61%. This popularity means a massive community creates themes and plugins specifically designed to work with the block editor, giving you nearly endless possibilities. You can read more about WordPress's global reach on WPZOOM.com.
Finalizing Your Edits
Once you've made your changes, you have to save them. It sounds obvious, but you'd be surprised how many times people close the tab and lose all their hard work.
Key Takeaway: Before you hit publish, always use the "Preview" button. It opens a new tab that shows you exactly what your page will look like to visitors. This is your chance to catch weird formatting issues or embarrassing typos before the world sees them.
When you're happy with how everything looks, check the top-right corner of the screen. You’ll see a couple of options:
- Save Draft: This is your best friend when you're in the middle of a big project. It saves all your changes without making them public, so you can step away and come back later.
- Update / Publish: This is the button that pushes your changes live. For a brand-new page, it will say "Publish." For an existing page you're editing, it will say "Update."
Once you get the hang of adding a few blocks, previewing your work, and saving correctly, you'll have all the core skills needed to manage your website's content with confidence.
Customizing Your Website's Design and Layout
Your content lives in pages and posts, but your site's overall design is what truly makes that first impression. A smart, intuitive design builds trust and helps visitors find exactly what they’re looking for. This is where we move beyond editing individual pages and start shaping the entire look and feel of your WordPress site.
Thankfully, you don't need to be a web designer to make meaningful changes. Most of your site's visual DNA is controlled from one central hub: the Theme Customizer. To get there, just head to Appearance > Customize from your WordPress dashboard. Think of it as your design command center, where you can make big changes without ever touching a line of code.
Using the Theme Customizer
Once you open the Customizer, you’ll see a live preview of your website with a control panel on the left. Any change you make in the panel—like swapping a color or font—shows up instantly on the right. It’s a fantastic, risk-free way to experiment.
Here are a few of the most common things you’ll probably want to adjust first:
- Logo and Tagline: Dive into the "Site Identity" section to upload your logo and edit your site title or tagline.
- Color Palette: Look for a "Colors" panel. Most themes let you define primary and accent colors to align with your brand's style guide.
- Fonts and Typography: A "Typography" section is where you can control the fonts for your headlines and body text, a small change that has a huge impact.
Expert Tip: Every theme is different. Some offer just the basics in the Customizer, while premium themes can pack in hundreds of settings. I always recommend spending a few minutes just clicking through every option to see what your specific theme can do. You might be surprised.
Getting these core design elements right is key to how people perceive your brand. When you're thinking about design, don't forget how a well-placed and effective testimonial design for your website can instantly build credibility and social proof.
Managing Navigation Menus and Widgets
Clear navigation is everything. If people can't find their way around, they'll leave. The Customizer is also the spot where you can manage your navigation menus. Here, you can add new pages to your main menu, create drop-down sub-menus, and drag-and-drop links into a logical order.
Widgets are another powerful tool in your design arsenal. These are basically small, self-contained blocks of content you can place in designated areas like your sidebar or footer. You can manage these from Appearance > Widgets.
The Widgets screen uses a familiar block-based interface. You can add or remove blocks to display all sorts of useful things, such as:
- A handy search bar
- A list of your latest blog posts
- A short author bio
- Contact details and social media icons
Always remember that a clean design isn't just about looks; it directly impacts your site's speed. After you’ve tweaked your layout, it’s a smart move to look into some WordPress performance optimization techniques to make sure your beautiful new site is also lightning-fast.
Adding New Features with WordPress Plugins
If you think of pages and themes as the walls and foundation of your website, plugins are the tools and appliances that bring it to life. They're like apps for your site. With just a few clicks, you can add powerful new features—turning a simple blog into an online store, a portfolio, or a booking system.
This incredible flexibility is what makes WordPress so popular. As of 2025, it powers over 43.5% of all websites on the internet. A big reason for that dominance is the massive library of over 59,000 free plugins available in the official directory. This ecosystem lets you add almost any function you can imagine without ever touching a line of code.
For instance, you could effortlessly sell event tickets on your WordPress site just by installing the right plugin. It's that straightforward.
How to Install and Activate a Plugin
Let's walk through a real-world example: adding a contact form. Nearly every website needs one so visitors can easily reach out.
First, head to your WordPress dashboard and find Plugins > Add New Plugin in the left-hand menu. This takes you right into the official plugin directory. In the search bar, type "contact form," and you’ll see a ton of options pop up. A good rule of thumb is to pick one with lots of positive reviews and a high number of active installations—it's a sign of quality and reliability.
Once you’ve made your choice, click the Install Now button. WordPress will handle the download. After a moment, the button will change to say Activate. Click it again. Just like that, the plugin is installed and running on your site. Most form plugins will add a new menu item to your dashboard, where you can start building and customizing your form.
Crucial Plugin Maintenance and Safety
Installing plugins is the easy part. The real work is managing them responsibly to keep your site secure and fast. I can't stress this enough: outdated or abandoned plugins are one of the biggest security risks for any WordPress site.
My Two Cents: Treat plugin updates like you treat app updates on your phone—they are not optional. Developers push out these updates to patch security vulnerabilities, fix bugs, and stay compatible with the latest WordPress core. Ignoring them is asking for trouble.
Here are my non-negotiable rules for managing plugins:
- Update Religiously. As soon as you see that little red update notification, take care of it.
- Delete What You Don’t Need. If a plugin is deactivated and you have no plans to use it again, delete it. Don’t just leave it sitting there. Inactive code is still a potential backdoor for hackers.
- Be Picky. Only install plugins from the official WordPress directory or from well-known, reputable developers.
Remember, adding or changing plugins can sometimes affect how your site loads for visitors. After you’ve made some changes, it’s always a good idea to learn how to clear your WordPress cache. This ensures everyone sees the latest, fastest version of your site.
Essential Habits for a Healthy and Secure Website
Knowing your way around the WordPress editor is a great start, but the real secret to a successful website isn't just about adding new content. It’s about smart, consistent maintenance. Think of it like owning a car—you can drive it every day, but it still needs regular oil changes and check-ups to run smoothly and stay safe on the road.
These habits are what protect your hard work and keep your site healthy for years to come.
Backups Are Your Ultimate Safety Net
One of the most critical habits you can build is performing regular backups. A website backup is simply a complete copy of everything: your files, your images, and your database. If something ever goes wrong—and trust me, at some point it will—a recent backup is your get-out-of-jail-free card.
A bad plugin update, a server hiccup, or a security issue can all be fixed in minutes by restoring from a good backup.
The best way to handle this? Automate it. Manually backing up your site is a chore, and it’s way too easy to forget. I always recommend using a trusted backup plugin. Set it up to run daily or weekly and, for extra security, have it save the backups to an off-site location like Google Drive or Dropbox. This is non-negotiable.
Beyond just backups, keeping your site technically sound is a must. This includes understanding what technical SEO entails, which helps search engines find and rank your content.
The Golden Rule of WordPress Updates
If you do only one thing for your site’s security, make it this: keep everything updated. When you log into your dashboard, you'll see update notifications for three things:
- WordPress Core: The main software that runs your site.
- Themes: Your site's design and layout.
- Plugins: The tools that add extra features.
That little red circle with a number in it isn't a suggestion—it's a critical alert. A staggering 90% of hacked WordPress sites are a result of outdated software. Updates aren't just about new features; they often contain vital security patches and bug fixes that protect you from known vulnerabilities.
A Personal Tip: Before I hit the "update" button on anything major, I always double-check that a fresh backup has just finished. Updates are usually seamless, but having that safety net gives me complete peace of mind, knowing I can roll back instantly if something goes sideways.
This proactive mindset is the foundation of any solid WordPress website maintenance plan. It’s all about stopping problems before they even have a chance to start.
Use Smart User Roles to Minimize Risk
Let's talk about how you log in. As an Administrator, you have the keys to the entire kingdom. You can install plugins, change themes, and even delete the entire site with a few clicks. Using that all-powerful account for everyday writing and editing is like using a sledgehammer to hang a picture. It’s overkill, and it’s risky.
For your day-to-day work, it’s much smarter to use an account with a more limited role.
Giving team members (or even yourself for daily tasks) the right permissions is a simple but powerful security move. If an account with limited access is compromised, the damage is contained instead of catastrophic.
WordPress User Roles and Key Permissions
Choosing the right user role for different tasks is one of the easiest ways to keep your website secure.
| User Role | Key Permissions | When to Use It |
|---|---|---|
| Administrator | Full site control. Can install plugins, change themes, add users. | For initial site setup and major technical changes. Use sparingly. |
| Editor | Can publish and manage posts/pages, including those by others. | For your main content manager or your own day-to-day writing. |
| Author | Can publish and manage their own posts only. | For guest bloggers or team members who only write their own content. |
| Contributor | Can write and manage their own posts but cannot publish them. | For new writers or anyone whose work needs review before going live. |
| Subscriber | Can only manage their own profile. | For newsletter sign-ups or basic site members who need to log in. |
By creating a separate Editor account for your daily content updates, you dramatically reduce your risk. If that account were ever compromised, the attacker couldn't install malicious software or tear down your site's infrastructure. It’s a free, simple security habit every WordPress owner should adopt.
A Few Common Questions About Editing WordPress
Once you start getting the hang of WordPress, you'll inevitably run into a few specific questions. It happens to everyone. Here are some of the most common ones I hear, along with some straightforward answers to get you unstuck and back to building your site.
Can I Edit My WordPress Website on My Phone?
Yes, you definitely can! The WordPress dashboard is designed to work surprisingly well on a mobile browser. You can log in just like you would on your computer and handle most tasks without much trouble.
For an even better experience on the go, I highly recommend the official WordPress app. It’s available for both iOS and Android and gives you a clean interface that’s perfect for writing a new blog post, uploading photos you just took, or even just checking your site’s stats from anywhere.
What's the Difference Between the Block Editor and a Page Builder?
This is a fantastic question, as the two can seem very similar at first glance. Think of it this way:
The Block Editor (which you might hear called "Gutenberg") is the default editor that comes with WordPress. It treats every piece of content—a paragraph, an image, a headline—as a movable "block." It's incredibly capable and is built right into the core of WordPress.
A Page Builder, on the other hand, is a plugin you add to your site. Tools like Elementor or Divi are popular examples. They typically offer a more visual, drag-and-drop experience and give you much more granular control over your page layouts, often letting you build complex designs that the standard editor can't handle easily.
How Can I Undo a Mistake I Made While Editing?
We've all been there—you delete a huge chunk of text by accident or make a change you immediately regret. Don't panic! WordPress has an amazing built-in safety net called Revisions.
Every time you save a draft or update a page, WordPress saves a snapshot of your content.
Key Insight: You can basically travel back in time. In the editor sidebar, find the "Revisions" link. Clicking it opens a screen where you can scroll through all your past saves, see what changed between versions, and restore an older one with a single click.
This feature has been an absolute lifesaver for me more times than I can count. It gives you the freedom to experiment without worrying about messing things up permanently.
Why Can't I See the "Plugins" or "Appearance" Menu?
If you've logged into your dashboard and can't find key menu items like "Plugins" or "Appearance," the issue is almost always your user role. WordPress uses a permissions system to control what different users can do.
- An Administrator has keys to the entire kingdom—they can install plugins, change themes, and manage all settings.
- Other roles like Editor, Author, or Contributor have more limited access, mostly focused on creating and publishing content.
If those menus are missing, you’re probably not logged in as an Administrator. It’s also worth noting that if your site is on WordPress.com, you might need to upgrade to a higher-tier plan to unlock the ability to install plugins.
Figuring out the ins and outs of a website can feel overwhelming, but you don't have to go it alone. At OneNine, our specialty is turning website management from a chore into a simple, effective process. Whether you need a fresh design, reliable maintenance, or just some expert guidance for your WordPress site, our team is ready to help you succeed. Let’s build something great together.


