

Thinking about moving your WordPress site to a new host can feel like a daunting technical chore. But I've found it's much more than that—it's a strategic move for your business. At its core, the process is about packing up your website's files and its database and setting them up with a new hosting provider. This is something businesses do all the time when they're ready to level up their site's performance, security, or support.
Why Moving Your WordPress Site Is a Smart Decision

Before we get into the nuts and bolts of the migration itself, let's talk about why this is often a necessary and powerful step. A lot of us start out on cheap, shared hosting plans. They're great for getting a site off the ground. But as your business grows, that entry-level service can start holding you back.
Slow load times, unexpected downtime, and customer support that leaves you hanging are all tell-tale signs that it's time for a change. I always advise people to stop thinking of migration as a hassle and start seeing it as an opportunity. It's the first real step toward building a more reliable and effective online presence.
Common Triggers for a Host Migration
Do any of these scenarios sound familiar? A slow website is a notorious conversion killer. If your pages crawl, potential customers will just click away. It's that simple. Or maybe your site crashed right in the middle of a big marketing campaign—that's not just lost money, it’s a hit to your brand's reputation.
Other critical signs it's time to move include:
- Poor Customer Support: Waiting hours (or even days) for a reply when your site is down is just not acceptable. A better host can feel like a true partner with responsive, expert support.
- Security Vulnerabilities: Shared hosting can sometimes leave you vulnerable to issues from other sites on the same server. Moving to a more secure setup protects your data and, more importantly, your customers' trust.
- Outgrowing Your Plan: You've simply hit the limits. Your current plan might not have the storage, bandwidth, or raw power to keep up with your traffic and new features.
A well-executed migration isn't just a technical update; it’s a direct investment in your business's future. It’s how you enhance user experience, lock down security, and make sure your website can grow as fast as your ambitions.
The Bigger Picture of WordPress Dominance
The need for a solid migration plan is magnified when you consider just how massive the WordPress world is. WordPress powers a staggering 43.2% of all websites on the internet, which translates to over 30 million active sites around the globe. This makes moving a WordPress site one of the most common tasks for businesses of every size.
With so many businesses relying on it, you really can’t afford significant downtime or, worse, data loss during the switch. You can dig into more of these stats over on ThemeIsle.com.
Ultimately, deciding to transfer your WordPress site to another host is about taking back control. It's about finding a hosting partner that truly aligns with your goals and gives you the solid foundation you need to succeed.
Your Essential Pre-Migration Checklist
Any project to transfer a WordPress site to another host lives or dies by its preparation. It’s so tempting to just dive in, but I've seen it time and time again—rushing this initial stage is the number one cause of migration headaches, from unexpected downtime to lost data. Think of it like prepping a room for painting; if you skip the taping and sanding, you’re guaranteed a messy, frustrating result.
Before you even think about moving a single file, you need a complete inventory of what you're working with. Start by listing every active plugin and theme. I find a simple spreadsheet works best for this. Make sure to jot down their version numbers and any license keys you might need later.
This isn't just busywork. This list becomes your roadmap for setting everything back up on the new server, ensuring you don't forget that one crucial plugin that runs your contact forms or your entire checkout process.
Take a Complete and Verified Backup
If you take away only one thing from this guide, let it be this: do not proceed without a full, restorable backup of both your website files and your database. This is your safety net, plain and simple. If something goes sideways during the transfer, you can always hit the reset button and restore your site to its original state.
Most hosts offer one-click backup tools, and they're a decent starting point. But I always, always recommend creating your own independent backup as well. There are some fantastic plugins out there that make this incredibly straightforward.
For instance, here's what you'll see inside UpdraftPlus, a plugin I've trusted on countless projects:
See how it gives you clear options to back up everything at once or just specific parts like your database, plugins, or themes? That kind of control is exactly what you want. For a deeper dive, check out our guide on creating and managing reliable website backups.
A backup you haven't tested is just a guess. Once you have those backup files, try restoring them on a staging site or a local setup. This is the only way to know for sure that they're complete and not corrupted.
Document Everything You Can
Your checklist needs to go beyond just plugins and themes. It’s the little, often-forgotten details that can trip you up after the move.
- Custom Code Snippets: Did you or your developer add custom PHP to your
functions.phpfile? What about tracking scripts in the header? Hunt them down and document every single one. - Third-Party Integrations: Make a list of every external service connected to your site. Think email marketing platforms, CRMs, analytics tools, or payment gateways.
- User Accounts: How many registered users do you have? Note their roles, especially if you're running a membership or e-commerce site.
- Core WordPress and PHP Versions: Record the current version of WordPress and the version of PHP running on your old server. This is critical for ensuring compatibility on the new host.
Plan the Timing of Your Migration
Finally, let's talk timing. You absolutely want to perform the migration when your site traffic is at its lowest. For most businesses, this means late at night or over a weekend. A quick look at your website analytics will tell you exactly when your quietest hours are.
While the migration is happening, it’s a smart move to put up a maintenance page. It tells visitors you’re doing scheduled work, which looks a whole lot more professional than a broken site or a cryptic error message. A simple plugin like WP Maintenance Mode gets the job done perfectly, protecting your brand's image while you work your magic behind the scenes.
Choosing the Right WordPress Migration Method
Deciding how to transfer your WordPress site to another host isn’t about finding a single "best" way—it's about finding the best way for you. Your comfort level with the tech, how complex your site is, and your timeline all have a huge say in this. Getting this choice right from the start can save you a world of headaches down the road.
We're going to walk through three main paths: using a dedicated migration plugin, letting your new host handle it, or rolling up your sleeves for a manual transfer. Each has its own set of pros and cons. Understanding these trade-offs is key to moving forward with confidence.
But before you dive in, you need to be absolutely sure you've done the prep work. This flowchart is a great gut-check to see if you're actually ready to start the move.
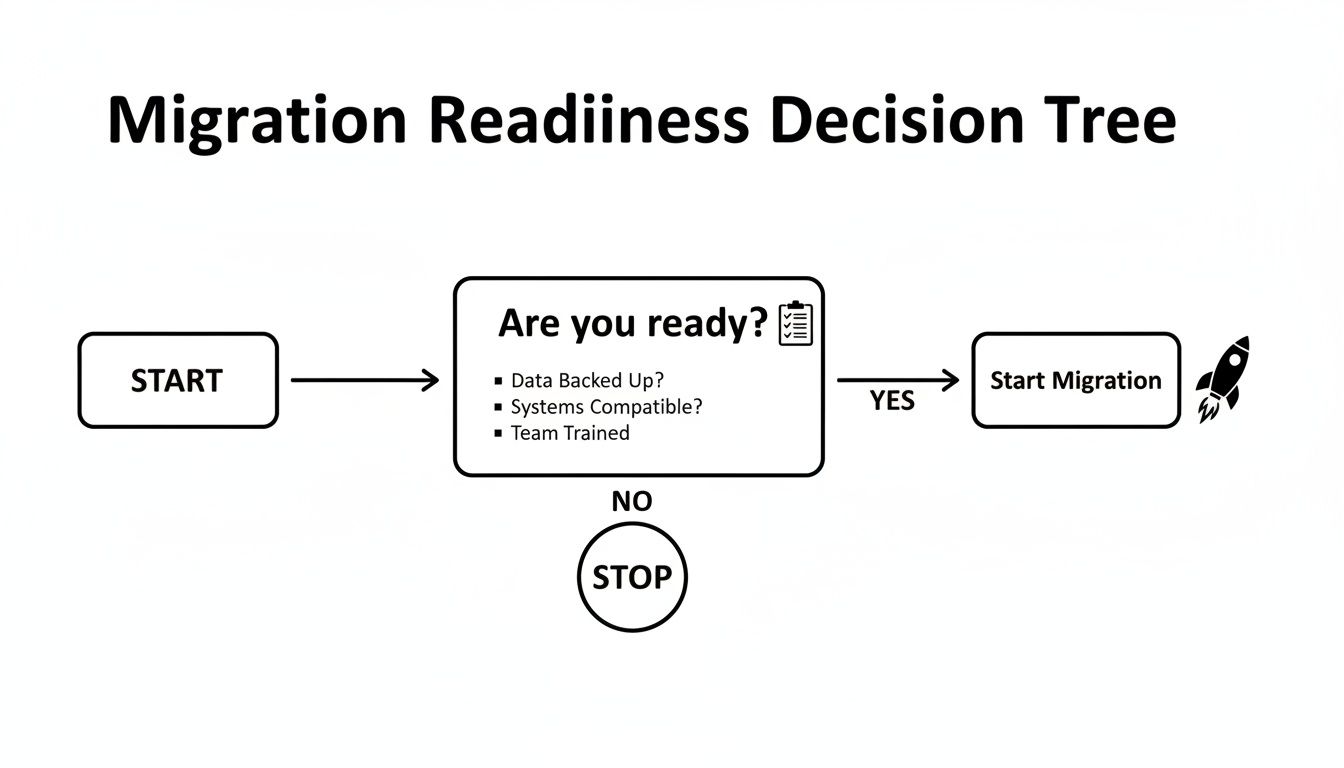
The message here is simple: if you haven't checked off your pre-migration list, stop. A successful move is built on a foundation of solid preparation. Don't rush it.
Comparing WordPress Migration Methods
To help you decide, here's a side-by-side look at the most popular ways to transfer your WordPress site. This table breaks down what each method is best for, along with the good and the bad, so you can pick the right path for your situation.
| Migration Method | Best For | Pros | Cons |
|---|---|---|---|
| Migration Plugins | Beginners, small-to-medium sites, and anyone wanting a guided process. | Simple and automated; reduces human error; handles URL updates automatically. | Free versions often have file size limits; premium plugins can have a cost. |
| Host Migration Service | Business owners, non-technical users, or anyone short on time. | Completely hands-off; handled by experts; often free with a new plan. | You lose direct control over timing; may have a small fee depending on the host. |
| Manual Migration | Developers, tech-savvy users, and owners of large or complex websites. | Total control over the process; free; great for non-standard setups. | Highest potential for error; requires FTP/database knowledge; very time-consuming. |
Ultimately, the best choice depends on a frank assessment of your skills, your site's complexity, and how much time you can realistically dedicate to the project.
Method 1: Using a WordPress Migration Plugin
For most people, especially those who'd rather not mess with FTP or databases, migration plugins are a godsend. They work by bundling up your entire site—themes, plugins, media, and database—into a single, neat package file.
Think of it as putting your site in a box. You install a plugin like All-in-One WP Migration or Duplicator on your old site, create the package, and then use the same plugin on a fresh WordPress installation at your new host to unpack it. It even handles the tricky business of updating database connections and site URLs for you.
- Who it's for: Beginners, owners of small blogs or brochure websites, and anyone looking for a straightforward, guided process.
- Key benefit: It's all about simplicity and automation. The plugin drastically cuts down on the chances of a typo in a config file bringing your site down.
- A word of caution: Be mindful of size limits. The free versions of these plugins often can't handle very large sites. If you have gigabytes of media uploads, you'll likely need to spring for a premium version.
Method 2: Taking Advantage of Host Migration Services
Honestly, this is the easiest route, hands down. Many of the best website hosting providers offer a free or low-cost migration service to get you to switch. All you do is give them the keys to your old site, and their team of experts handles everything.
With this approach, the technical work is completely off your plate. These teams have done this thousands of times, so they know what to look for and how to handle any weirdness that comes up during the transfer. The only real trade-off is that you're on their schedule, not yours.
If you're a business owner, your time is probably better spent on sales or marketing, not wrestling with a site transfer. The value of having an expert team manage the move often far outweighs the cost—if there even is one.
The process is usually as simple as opening a support ticket and securely providing your WordPress admin and old hosting logins. They'll give you an ETA and let you know when it's done and ready for you to check.
Method 3: Performing a Manual Migration
The manual method is for those who want total control. It's the most powerful and flexible approach, but it's also the most demanding. You'll use an FTP client like FileZilla to download all your website files and a tool like phpMyAdmin to export the database. Then, you just reverse the process on the new server.
This is the go-to option for highly complex or unusual sites where an automated tool might get tripped up. If you have an enormous database, a custom file structure, or specific server needs, a manual transfer ensures every single piece lands exactly where it should. Plus, you aren't relying on any third-party tools.
Thinking about a manual move for a larger business? It's worth understanding how it fits into a broader plan. For a deeper dive on that topic, this resource on Mastering Your Enterprise Cloud Migration Strategy is an excellent read.
- Who it's for: Developers, technically confident users, and anyone with a large, complex, or mission-critical website.
- Key benefit: You get absolute control and a much deeper understanding of how your site is put together. It's also completely free.
- Biggest risk: This method has the highest potential for error. One tiny mistake, like a typo in the
wp-config.phpfile, can take your entire site offline. Proceed with caution.
A Practical Guide to Manual WordPress Migration
While plugins and hosting migration tools are great for simple moves, sometimes you just need to get your hands dirty. For really complex sites, servers with unusual setups, or just for the sheer confidence of knowing you’ve handled every last detail yourself, a manual migration is the gold standard.
It might sound intimidating, but it's a completely manageable process when you break it down. Think of it this way: you’re simply moving two key things—your website's files and its database. Get those two components from the old host to the new one, connect them, and you're in business. Let's walk through exactly how it's done.
Grab Your Website Files with FTP
First things first, you need a complete copy of all the files that make up your site. The classic tool for this job is an FTP (File Transfer Protocol) client. Essentially, it’s a program that acts like a bridge, letting you drag and drop files between your computer and your web server.
If you don't have one, I'd recommend grabbing FileZilla; it’s free, reliable, and runs on pretty much everything. Once you've got it installed, you’ll use your FTP login details from your old host to connect.
Your target is the root directory of your WordPress installation, which is usually a folder called public_html or named after your domain. Inside, you'll see a bunch of files and folders. The most important ones you need to copy are:
wp-content: This is the heart of your site. It holds your themes, plugins, and every image or file you’ve ever uploaded.wp-includes: This contains the core WordPress engine files.wp-admin: This folder runs your entire WordPress dashboard.
Drag everything from the server (often called the "remote site") over to a folder on your computer (the "local site"). Kick back and let it run—this can take a good while if your site has a lot of high-resolution images or media files.
Export the Brains of Your Operation: The Database
While your files are chugging along, you can tackle the second major component: the database. If the files are the skeleton of your site, the database is the brain. It stores every post, page, comment, user profile, and setting. Without it, you just have a collection of empty theme files.
The go-to tool for this is phpMyAdmin, which you'll find in almost any hosting control panel (like cPanel or Plesk).
Getting your data out is straightforward:
- Log in to phpMyAdmin and select your WordPress database from the list on the left. (If you’re not sure which one it is, the name is defined in your
wp-config.phpfile.) - Click the "Export" tab at the top of the screen.
- The "Quick" export method is usually all you need. Just make sure the format is set to "SQL".
- Hit the "Go" button, and a
.sqlfile will download to your computer. This file is a complete snapshot of your site's content and structure.
My Pro Tip: Create a dedicated project folder on your desktop for this migration. Keep the website files and the
.sqldatabase export in that one place. Staying organized is half the battle in a manual move.
Set Up the New Server
Alright, time to prep the destination. Over at your new host, the first thing you need to do is create a new, empty database. Your hosting control panel will have a tool for this, often called "MySQL Databases" or something similar.
During this process, you will create three things: a database name, a database user, and a password for that user. Seriously, write these down or save them in a secure note—you will need them in a few minutes.
With the empty database ready, it's time to upload your website files. Fire up your FTP client again, connect to the new host, and transfer all the files you downloaded earlier into the new server's root directory (again, probably public_html).
Make the Final Connection
We're in the home stretch! Your files are on the new server and your content is ready to be imported. The final, critical step is to tell WordPress how to talk to its new database.
This magic happens in one file: wp-config.php. You just uploaded it along with everything else.
Find the wp-config.php file on your new server (you can edit it directly in your host's file manager or download it, edit, and re-upload). Open it and look for these specific lines:
define( 'DB_NAME', 'old_database_name' );
define( 'DB_USER', 'old_username' );
define( 'DB_PASSWORD', 'old_password' );
Carefully replace the old placeholder values with the new database name, username, and password you created a moment ago. Save the file.
The very last step is to populate your new database. Open phpMyAdmin on your new host, select your new empty database, click the "Import" tab, and upload the .sql file you exported earlier.
And that's it! Your files and database are now in their new home and properly connected. It's a hands-on process, but it gives you complete assurance that every single piece of your site made the journey safely.
Your Post-Migration Go-Live Checklist
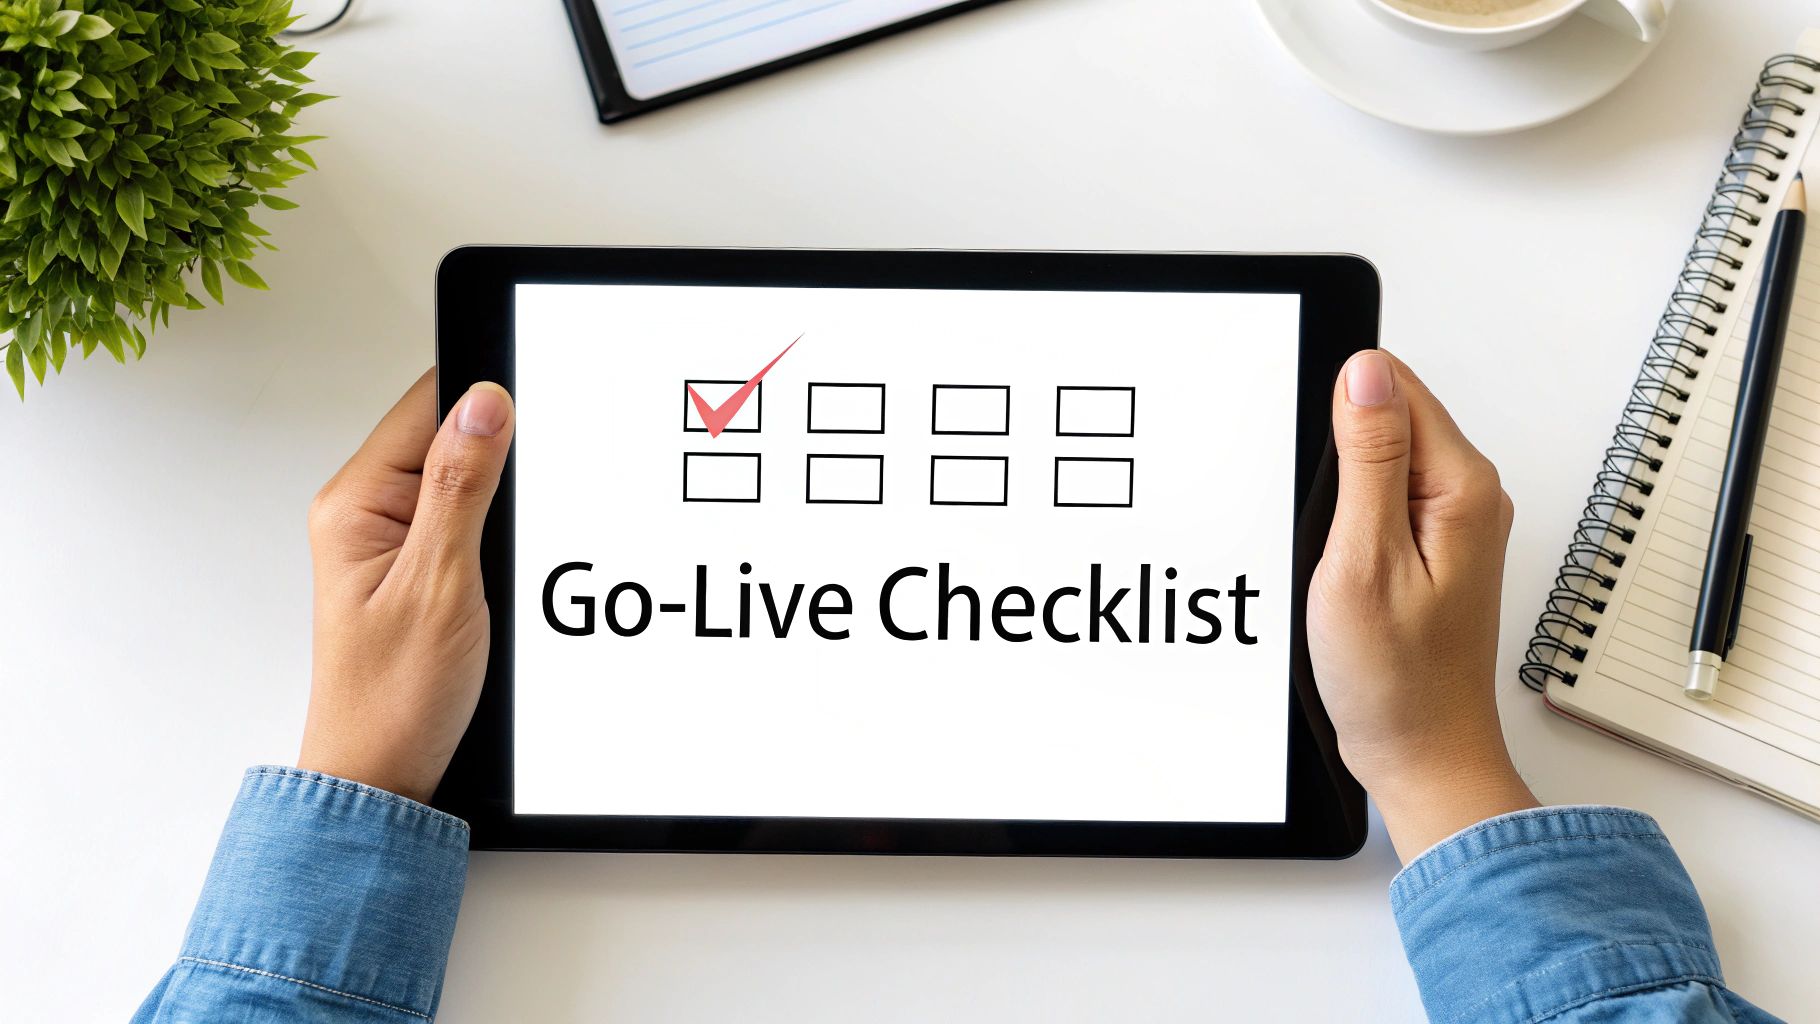
The heavy lifting is over—your files and database are sitting comfortably on their new server. But don't pop the champagne just yet. This final stage is all about flipping the switch and making sure your site not only goes live without a hitch but also thrives in its new home.
Think of this as the final walk-through before you hand over the keys. It’s a meticulous process of testing, checking, and double-checking to catch any small issues before your visitors do. Rushing this last step can undermine all the careful work you’ve put in to transfer your WordPress site to another host.
Point Your Domain to the New Server
First things first, you need to tell the internet where to find your website's new address. This is done by updating your domain's DNS settings. You'll need to log in to your domain registrar—the company you bought your domain name from—and change the nameservers to the ones provided by your new host.
Your new hosting company will give you the exact nameserver addresses to use. Be aware that this change isn't instant; it kicks off a process called DNS propagation.
DNS propagation is the time it takes for servers across the globe to update their records with your site's new location. This can take anywhere from a few hours up to 48 hours, though it's often much quicker. During this window, some visitors might see the old site while others see the new one. This is completely normal, so don't panic.
Conduct a Thorough Site Audit
Once you're confident the DNS has had time to propagate, it’s time to play detective. Don't just glance at your homepage and call it a day. You need to go through your site with a fine-tooth comb to ensure everything works exactly as it did before the move.
Here's what your testing checklist should look like:
- Link Integrity: Click through your main navigation, footer links, and a handful of internal links within your content. Keep an eye out for any 404 "not found" errors.
- Functional Forms: Test every single form on your site. This means your main contact form, newsletter sign-ups, and any quote request forms. Make sure the submissions are actually being delivered to your inbox.
- Media and Images: Scroll through key pages and galleries. Are all your images, videos, and downloads loading properly? A broken image icon is a dead giveaway that something went wrong.
- Plugin Functionality: Check the core features provided by your most important plugins. If you run an online store, for example, try adding an item to the cart and going through the entire checkout process.
After making significant changes, it’s always a good idea to flush your site’s cache. Old, stored versions of your pages can sometimes cause confusing visual glitches or prevent you from seeing the live version of your site. Learning the basics of how to clear your WordPress cache is an invaluable skill for any site owner.
Secure Your Site with a New SSL Certificate
Security is non-negotiable. Your SSL certificate, which enables the secure HTTPS connection (the little padlock in the browser bar), is tied to your old hosting account and doesn't transfer automatically. You must install a new one on your new server immediately.
Most quality hosts, including OneNine, make this incredibly simple. They often provide a free Let's Encrypt SSL certificate that you can install with just a few clicks. If you skip this, visitors will be hit with a scary browser security warning, which is a surefire way to lose trust and traffic. When you transfer your WordPress site to another host, it's critical to ensure your website move doesn't tank SEO, and a missing SSL is a major red flag for search engines.
Monitor and Decommission the Old Host
For the first week after going live, keep a close watch on your site. Monitor your analytics for any unusual dips in traffic and use a tool like Google Search Console to check for any new crawl errors that might have popped up.
Once you are 100% certain that the new site is stable, traffic is flowing correctly, and you have a fresh backup saved from the new host, then you can finally cancel your old hosting account. Don't jump the gun on this; that old account is your ultimate safety net until you're absolutely sure the new one is working perfectly.
Your Top WordPress Transfer Questions, Answered
Even with the best guide in hand, you’re bound to have a few questions when it’s time to transfer a WordPress site to another host. I get it. We’ve heard them all, so here are some clear, no-nonsense answers to the questions we see most often.
How Long Does This Whole Thing Take?
This is the big one, and the honest answer is: it depends. But let's get more specific.
If you're running a small blog or a simple business site and using a solid migration plugin, the hands-on part of the job might only be 1-3 hours. For a more complicated site where you're moving things manually, an experienced pro could spend 3-6 hours on the task.
The real wildcard, though, is DNS propagation. Think of it as the internet's global address book updating to reflect your site's new home. While it often resolves in just a few hours, the official window can be up to 48 hours. Your site will still be online during this period, but it's a crucial part of the timeline to plan around.
Is Moving My Site Going to Wreck My SEO?
A sloppy migration absolutely can, at least temporarily. Search engines hate seeing downtime, broken links, or a missing SSL certificate. But if you follow a solid post-migration checklist, any negative impact should be tiny or non-existent.
In fact, this move can be a huge plus for your SEO. Shifting to a faster host directly improves your Core Web Vitals, which is a big-ticket ranking factor for Google. A more reliable server with better uptime also signals a high-quality user experience—exactly what search engines want to reward.
A well-planned WordPress transfer isn't an SEO risk; it's an SEO opportunity. By improving site speed and reliability, you're investing directly in your long-term search performance.
Can I Really Move My WordPress Site with Zero Downtime?
Yes, you can! A zero-downtime migration isn't a myth; it's the professional standard and totally achievable. It all comes down to a smart, parallel process.
- Keep the Old Site Running: Your current site stays live and serving visitors while you work on a complete copy of it on the new server.
- Test Behind the Scenes: You can thoroughly test the new site using a temporary URL or by modifying your computer's
hostsfile. This lets you click through everything and make sure it's perfect before anyone else sees it. - Make the Switch: Once you’ve confirmed the new site is 100% ready, you just update your DNS records to point your domain to the new server's IP address.
As the DNS updates propagate, visitors will be sent to either the old or the new site—but either way, they see a working website. No one ever hits a dreaded error page.
When Should I Just Hire a Pro for This?
Look, DIY is great for straightforward sites like a personal blog or a simple portfolio. But some situations just call for an expert. You should seriously consider bringing in a professional if you're dealing with:
- Large E-commerce Stores: When you have live customer data, complex order histories, and payment gateways in the mix, the stakes are way too high for guesswork.
- Membership Sites: Protecting user accounts, passwords, and sensitive subscription information is non-negotiable.
- Highly Custom Sites: If your site is built with custom code, complex plugin integrations, or a massive database, a seasoned expert is needed to navigate the quirks.
It really boils down to risk. If you're not fully confident in the technical details, or if an hour of downtime could cost you serious revenue, investing in a professional migration service is a smart business decision. It buys you peace of mind and a guarantee that it's done right the first time.
If your migration feels a bit too complex or you’d rather have the assurance of an expert handling it, OneNine is here to help. We manage website transfers daily, guaranteeing a smooth and secure transition with zero downtime. Let us take care of the technical side so you can stay focused on running your business. Learn more about our website management services.


