Moving your WordPress site can feel like a massive, high-stakes project. But with a solid game plan, it's a completely manageable process. This guide is your step-by-step roadmap, whether you're switching to a better host, launching a new domain, or finally pushing your staging site live.
A well-thought-out migration is all about protecting your data, keeping downtime to an absolute minimum, and making sure you don't lose your hard-earned SEO rankings.
Why You Need a WordPress Migration Game Plan
Successfully moving a WordPress site is less about technical genius and more about meticulous planning. If you jump in without a strategy, you're asking for trouble—broken links, lost data, and confused visitors are almost guaranteed.
Think of it like moving to a new house. You wouldn't just toss everything into a truck at random. You'd label boxes, schedule movers, and get the utilities turned on ahead of time. The same logic applies here. This guide gives you that structure, focusing on the key decisions and actions you need to take for a smooth move.
To get a head start, you can grab our complete checklist to keep every task organized: https://onenine.com/website-migration-checklist-ultimate-guide-successful-transfer/
Understanding the Migration Landscape
The need to migrate a WordPress site is something almost every website owner faces eventually. The platform's flexibility is a big reason it powers a staggering 43.1% to 43.6% of all websites worldwide. This huge community has produced over 65,000 plugins that can simplify just about anything, including a full-site migration.
You might need to migrate for a few common reasons:
- Upgrading Your Hosting: Your current host is slow, unreliable, or just can't keep up with your growth.
- Changing Your Domain Name: A rebrand or a better domain name means moving the entire site to a new address.
- Moving from a Staging Environment: This is a daily task for developers and agencies pushing a new design or feature set live.
A successful migration is invisible to your users. They should visit your site one day, and the next, everything works perfectly—they're just on a faster, better server without even realizing it.
Choosing Your Migration Path
Throughout this guide, we’ll walk through the three main ways to tackle a migration. Each has its pros and cons, and the best choice really depends on your technical confidence and how complex your site is.
No matter which path you choose, following essential data migration best practices is key to a smooth transition.
Here’s what we’ll break down:
- The Manual Method: For those who want total control, using tools like FTP/SFTP and phpMyAdmin.
- The Plugin Route: The go-to choice for most small businesses, using trusted plugins that automate the heavy lifting.
- The Hosting Service Approach: The easiest option by far, where you let your hosting provider handle the entire transfer for you.
By understanding these options from the start, you can build a game plan that fits your resources and takes the stress out of the process.
Getting Your Ducks in a Row: The Pre-Migration Checklist
Before you even think about moving a single file, you need a solid game plan. I can't stress this enough: rushing the prep work is the single biggest mistake people make when they migrate a WordPress site. Think of this as your pre-flight check—it’s what ensures a smooth takeoff and a safe landing on the new server.
This isn't just about avoiding disaster. It's about creating a clear inventory of everything that needs to be moved and double-checked once you're on the other side. A good checklist turns a potentially chaotic scramble into a calm, step-by-step process. For a wider perspective on this, a good digital platform migration checklist can be a fantastic resource.
First Things First: Secure a Full Backup
Your absolute, non-negotiable first step is to back up your entire website. This is your insurance policy. If something goes sideways, this backup is what lets you hit the "undo" button and restore your site in minutes.
A complete backup always has two parts:
- Your WordPress Files: This means everything, but especially the
wp-contentfolder. That’s where your themes, plugins, and all your uploaded images and media live. - Your WordPress Database: This is the heart of your site. It stores every post, page, comment, user, and setting. Without it, you just have a collection of empty theme files.
While many hosting providers offer convenient one-click backups, I always tell my clients to create their own manual backup and download it to their local computer. This gives you an off-site copy that you control completely—a cornerstone of any real disaster recovery plan. You can learn more by reading up on these best practices for website backup strategies.
Take a Snapshot of Your Current Setup
Next, you need to document what your current environment looks like. You might think you'll remember all the little details, but trust me, when you're staring at an error message, having a reference sheet is a lifesaver.
Grab the following details and put them in a simple document:
- A list of all active plugins: Just take a screenshot of your plugins page or use a plugin to export the list. This is your checklist for making sure everything is reactivated on the new site.
- Theme and customization details: Note down your current theme, whether you're using a child theme, and any custom CSS you've added in the Customizer.
- Core WordPress settings: Pay special attention to your permalink structure. Also, note your reading settings and anything else you've specifically configured.
- PHP Version: This is a big one. Check the PHP version in your current hosting panel. A mismatch between the old and new server's PHP version is one of the most common causes of a failed migration.
A simple text file with this information can save you hours of guesswork. It’s your blueprint for reconstructing your site’s environment accurately on the new server.
Taking the time to handle these prep steps builds a safety net and gives you a clear point of reference. It shifts the migration from a high-stakes gamble to a controlled, predictable project.
Choosing Your Migration Method
Moving a WordPress site is a big deal, and the first major decision you'll make is how you're going to do it. There’s no single right answer here. The best path for you really depends on your technical comfort level, how much time you have, and whether you want to be in the driver's seat for the entire process.
We're going to walk through the three main ways people tackle this: doing it all by hand, using a trusty plugin, or simply letting your hosting company handle the heavy lifting. Each one has its own set of pros and cons, so let's dig in and find the right fit for your situation.
The Manual Migration Path
Going the manual route is the most hands-on you can get. This means you'll be using an FTP client (like FileZilla) to move your website's files and a database tool (like phpMyAdmin) to export and import your database. It gives you complete, granular control over every single file and database table.
For a seasoned developer, that level of control is fantastic. You know exactly what's moving where and can troubleshoot problems with surgical precision. But with great power comes great responsibility. A tiny mistake—like a typo in your database credentials or a file transfer that cuts out halfway—can bring your entire site down in an instant.
So, when does it make sense to go manual?
- You have a complex or highly custom site. If your setup is unconventional, a manual move lets you address all the unique quirks one by one.
- You need absolute control. No automated scripts, no black boxes. You oversee every step of the transfer yourself.
- You want to learn. Honestly, it’s one of the best ways to get a deep understanding of how all the pieces of a WordPress site fit together.
Think of it like packing and driving your own moving truck. You have total control and it can save you money, but you're personally responsible for making sure nothing gets broken along the way.
The Plugin-Assisted Migration
For the vast majority of people, using a plugin is the perfect middle ground. Migration plugins are built to do one thing and do it well: bundle up your entire site—files, database, themes, and all—into one neat package that you can easily move.
Tools like All-in-One WP Migration or Duplicator have made this process incredibly reliable. You just install the plugin on your old site, create an export file, and then import that file into a fresh WordPress installation at your new host. The plugin even handles the tricky "search-and-replace" job on the database to update all your old URLs to the new ones.
This approach strips away most of the risk of human error. It automates the technical bits that often trip people up, making a complex process feel surprisingly simple.
A good migration plugin is like hiring a professional moving crew. They pack everything up securely, move it safely, and unpack it for you at the new place. It's efficient, reliable, and way less stressful.
This is the go-to method for small business owners, agencies juggling client sites, and anyone who just wants a straightforward process that works every time.
The Managed Hosting Migration
The third option is often the easiest and most foolproof: let your hosting provider do it for you. Many top-tier managed WordPress hosts, like us here at OneNine, offer free or low-cost migration services to make switching to their platform as painless as possible. This is a huge perk that can save you a ton of time and worry.
With a managed migration, you typically just provide your current WordPress admin details. From there, their team of experts takes over, handling the entire transfer behind the scenes. They’ve done this thousands of times, so they have a finely tuned process to move sites with zero downtime.
This is the ultimate hands-off experience. It's perfect for anyone who'd rather spend their time running their business than fiddling with server settings. The only real trade-off is that you have less direct control over the exact timing, but the convenience is almost always worth it. When you're choosing a new host, the quality of their migration service should be a huge consideration. In fact, our guide on what to look for in the best WordPress hosting provider dives deeper into this.
A host that offers this service isn't just making your life easier—they're showing you they're committed to great support from day one.
Comparing WordPress Migration Methods
To make it even clearer, here’s a quick side-by-side look at the three approaches.
| Method | Technical Skill Required | Best For | Potential Cost |
|---|---|---|---|
| Manual Migration | High | Developers, large/complex sites, and users who need maximum control. | Free (your time) |
| Plugin Migration | Low | Most users, SMBs, agencies, and those seeking a reliable, simple process. | Free to ~$99 (for extensions) |
| Managed Host Migration | None | Business owners, beginners, and anyone prioritizing convenience and safety. | Often Free with new hosting |
At the end of the day, the goal is to get your site to its new home safely, without losing any data or suffering from downtime. By thinking about the trade-offs between control, convenience, and cost, you can confidently pick the method that’s right for you.
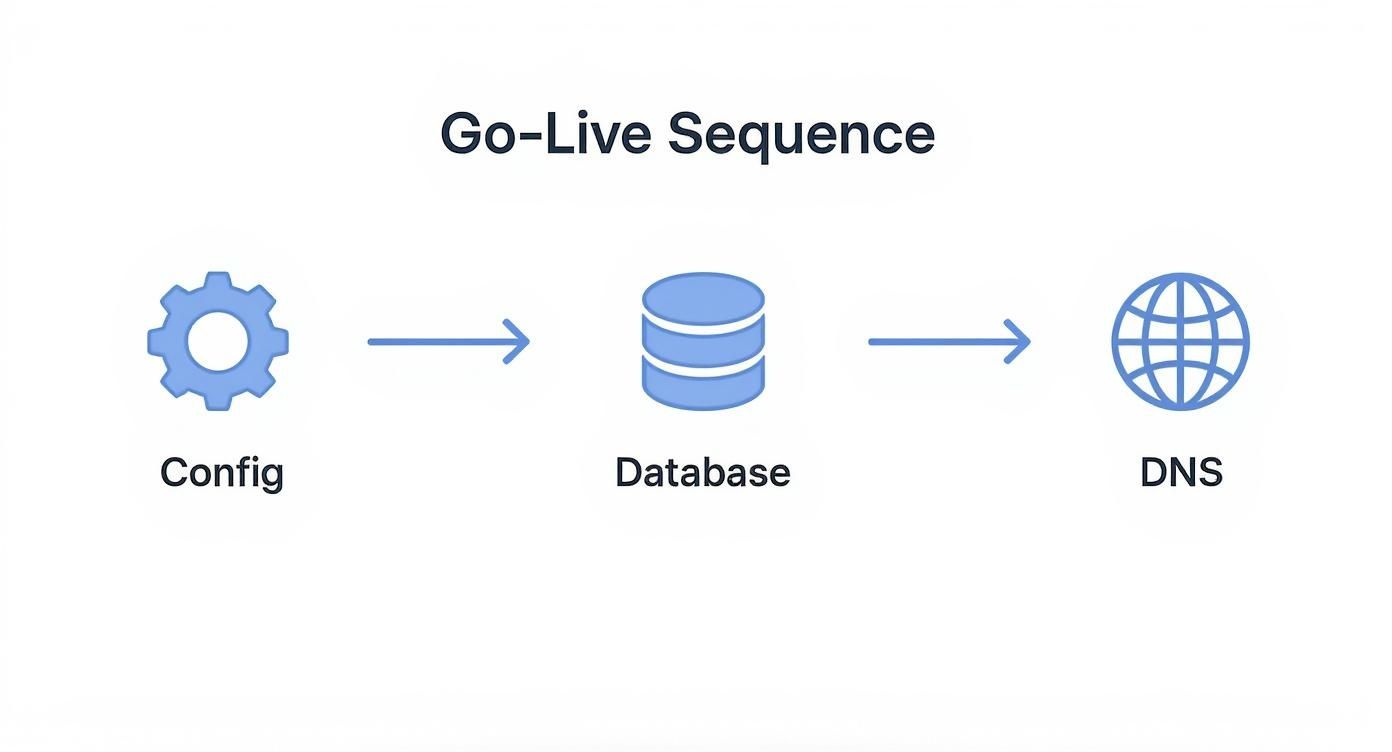
Making the Final Switch: The Go-Live Sequence
Getting your files and database onto the new server is a massive step, but you're not at the finish line just yet. Now comes the critical go-live sequence, where you turn that static copy into a living, breathing website. This is where the real magic happens, and getting the order of operations right is everything.
If you skip these steps, you're walking into a minefield of broken links, mixed-content browser errors, and frustrated visitors. Let's make sure that doesn't happen.
Connect the New Dots in wp-config.php
First things first, you need to tell WordPress how to talk to its new database. This vital connection is handled by a single, powerful file: wp-config.php. Think of it as the bridge between your WordPress installation and all the content stored in the database.
When you set up the new server, you created a fresh database with a unique name, username, and password. Now it's time to update your wp-config.php file to reflect that.
You'll need to carefully edit these specific lines:
DB_NAME(the name you gave your new database)DB_USER(the username you created for it)DB_PASSWORD(the strong password you set for that user)DB_HOST(this is usually 'localhost', but double-check with your hosting provider)
Even a single typo here will trigger the dreaded "Error Establishing a Database Connection." I always recommend copying and pasting the credentials directly from your host's control panel to avoid any mistakes. Once that's done, your site should technically load, but we're not ready for primetime.
The All-Important Search and Replace
This is, without a doubt, one of the most crucial moments for your site’s health and SEO. Your database is currently riddled with old URLs pointing to the previous server or a temporary domain. Every single image path, internal link, and asset reference needs to be updated.
Here’s a common misconception: just changing the "Site Address" in the WordPress settings won't cut it. That only fixes a tiny fraction of the problem. Themes and plugins often store full URLs directly in the database, frequently inside serialized data.
Running a simple find-and-replace on a database export file is a recipe for disaster. It will corrupt this serialized data, instantly breaking widgets, theme settings, and plugin functionality.
The only safe way to do this is with a tool that actually understands WordPress's data structure. A plugin like Better Search Replace or the built-in functions in migration plugins like Duplicator are designed specifically for this. They intelligently handle serialized data, ensuring every last URL is updated without breaking your site.
Finalizing the Switch
With your database links all pointing in the right direction, you're ready to flip the switch and make your site officially live. Follow this sequence for a clean, seamless cutover.
-
Point Your DNS Records: This is the moment of truth. Head over to your domain registrar (where you bought your domain) and update the A record to point to your new server's IP address. This is what tells the rest of the internet where to find your website's new home. Keep in mind that DNS changes can take a few hours to fully propagate around the world.
-
Flush Your Permalinks: Once your domain starts resolving to the new server, log in to your WordPress admin dashboard. Go to Settings > Permalinks and just click the "Save Changes" button. You don't need to change anything. This simple action forces WordPress to rebuild its
.htaccessfile, which ensures all your pretty URLs work correctly. -
Clear Every Layer of Cache: Finally, it's time to purge everything. Clear your WordPress caching plugin, any server-level caching your host provides (like Varnish or Redis), and your CDN cache (like Cloudflare) if you're using one. This ensures that all visitors are served the fresh, new version of your site, not a stale copy.
Nailing this go-live sequence is fundamental. With over 70% of new CMS-built websites as of 2025 being powered by WordPress, getting these final steps right ensures your migration helps your site grow instead of holding it back. You can find more interesting stats on the WordPress ecosystem and its growth here.
Troubleshooting Common Migration Headaches
No matter how meticulously you plan, things can still go sideways after a move. It happens. A successful migration isn't just about the transfer; it's about being ready to play detective and methodically squash the bugs that pop up.
Don't panic when you hit an error. Most post-migration issues are old news in the WordPress world—common, well-documented problems that usually have straightforward fixes. The trick is knowing where to look first.
Your Post-Migration Testing Checklist
Before popping the champagne, you need to become your site's toughest critic. Go through every nook and cranny of your website, from the public-facing pages to the admin dashboard, with a fine-tooth comb.
Here's a battle-tested checklist to guide you:
- Front-End Visuals: Does everything actually look right? Pull up your homepage, a couple of key service pages, and a few blog posts. Keep an eye out for wonky layouts, strange fonts, or off-brand colors—all classic signs that your CSS isn't loading properly.
- Image and Media Loading: Click through your photo galleries and media-heavy posts. Are all your images, videos, and PDFs loading without a hitch? Even one broken image could point to a much bigger problem with your URL paths.
- Core Functionality: It's time to test every interactive element. Fill out and submit your contact forms. Sign up for your own newsletter. Use the search bar. If you're running an e-commerce site, you absolutely must go through the entire purchase process, from adding a product to the cart to the final confirmation page.
- Navigation and Links: Be a click-happy user. Test every single link in your main menu, your footer, and any sidebars. Just as important, click on a few internal links within your blog posts or pages to make sure the permalink structure survived the trip.
- Admin Dashboard Health: Log into the WordPress back end. Can you create and publish a new post? Does the Media Library let you upload a new image? Are your plugin settings pages loading correctly or throwing errors?
This entire process is about confirming that the core pieces—configuration, database connection, and DNS updates—are all working together as they should.
When you follow a logical flow like this, it becomes much easier to pinpoint exactly where something went wrong, which makes troubleshooting a whole lot faster.
Solving The "Error Establishing a Database Connection"
This is the big one. It's probably the most common—and most heart-stopping—error you'll encounter. It looks catastrophic, but it almost always boils down to one simple thing: WordPress can't talk to your database.
Nine times out of ten, the culprit is a tiny typo in your wp-config.php file. You need to open that file and carefully check these four lines against the database credentials your new hosting provider gave you:
DB_NAMEDB_USERDB_PASSWORDDB_HOST
Pro Tip: I can tell you from experience that 99% of the time, the issue is a simple copy-paste mistake in the database name, username, or password. If you've triple-checked those and they're correct, confirm the
DB_HOSTvalue with your host. It's usuallylocalhost, but some managed hosts use a specific server address.
Taming The 500 Internal Server Error
The "500 Internal Server Error" is the most unhelpful error message of all. It's the server's way of saying, "Something broke, but I have no idea what." When this pops up right after a migration, it’s almost always caused by one of two things: a corrupted .htaccess file or a rebellious plugin.
First, try to fix your .htaccess file. The easiest way is to log into your WordPress admin, head over to Settings > Permalinks, and just click the "Save Changes" button without changing anything. This action forces WordPress to generate a fresh, clean .htaccess file.
If your site is still down, it's time to check for a plugin conflict. Using an FTP client, find your plugins folder inside wp-content and rename it to something like plugins_old. This instantly deactivates all of them. If your site comes back to life, you've found your problem. Now, rename the folder back to plugins and start reactivating them one by one in the admin dashboard until the error reappears. The last one you activated is the troublemaker.
Eliminating Mixed Content Warnings
You've moved to a new host with a shiny new SSL certificate, but your browser is still flagging the site with a "Not Secure" warning. What gives? You're likely dealing with mixed content.
This happens when the page itself loads securely over HTTPS, but some of the assets on it—like images, scripts, or stylesheets—are still being called from the old, insecure HTTP protocol.
This is a classic symptom of not running a complete search-and-replace on your database. The cleanest way to fix this is with a plugin like Better Search Replace. You'll use it to find every instance of http://yourdomain.com in your database and replace it with https://yourdomain.com. This ensures every single link and asset is called securely, making that pesky warning disappear for good.
Answering Your WordPress Migration Questions
Even with the best guide in hand, questions always pop up when you're getting ready to migrate a WordPress site. I've been there. Let's tackle the most common ones I hear from clients to help clear things up before you start.
Think of this as the "what-if" section. Answering these questions now will save you a ton of stress later, especially if you hit a snag mid-migration.
How Long Does It Really Take to Migrate a WordPress Site?
This is the classic "how long is a piece of string?" question, but I can give you some real-world context. The timeline can be anything from 30 minutes to a few hours, depending on a few key things: the total size of your site, the migration method you choose, and your internet speed.
Let's look at a couple of common scenarios:
- Small Blog: A personal blog with a few hundred posts and a standard theme, moved using a hosting company's automated tool? You could be done in under an hour. Easy.
- Large E-commerce Site: A big WooCommerce store with thousands of products, customer data, and tons of high-res images? If you're doing that manually, block out an entire afternoon.
My best advice is to always schedule your migration during your website's quietest hours. This way, if you run into any small issues, it won't disrupt your visitors.
Will Migrating My WordPress Site Hurt My SEO Rankings?
A well-planned migration should have virtually no negative impact on your SEO. A sloppy one, on the other hand, can be an absolute disaster for your search rankings. The move itself isn't the problem; it's the mistakes that can happen along the way.
Here are the biggest SEO pitfalls to watch out for:
- Extended Downtime: If your site is offline for too long, search engines will notice and can temporarily drop your pages from their index.
- Broken Internal Links: This is a classic mistake. It happens when you don't run a proper search-and-replace on the database, leaving links pointing to the old server or a temporary domain.
- No 301 Redirects: If you're changing your domain name, failing to set up proper 301 redirects from every single old URL to its new one is an SEO killer. It's non-negotiable.
To keep your rankings safe, always run a full, database-aware search-and-replace. As soon as you go live, regenerate your XML sitemap and submit it to Google. Then, use a tool to crawl your site for any 404 errors.
What Is the Safest Way to Migrate My Site?
For most business owners and agencies, the safest bet is using a trusted migration plugin or taking advantage of the migration service offered by a quality managed WordPress host. Tools like Duplicator and All-in-One WP Migration are built specifically to handle the tricky parts, which dramatically cuts down on the risk of human error.
These tools package your entire site—files, database, everything—into a single, secure archive. This ensures nothing gets missed or corrupted. They also manage the complex database updates safely, which is where things often go wrong in a manual move.
But no matter which method you pick, the single most critical safety step is making a complete, downloadable backup of your site before you touch anything. This is your get-out-of-jail-free card. Don't skip it.
When Do I Update My DNS Records?
Updating your DNS records is the very last step. You only need to do this if you're switching to a new hosting provider. Think of it as officially filing a change of address for your website.
Once you've moved all your files and the database to the new server and have double-checked that everything works perfectly (usually by testing with a temporary URL or editing your local hosts file), then you go to your domain registrar. You'll update your domain's A record to point to the new server's IP address. This is what tells browsers where to find your site from now on.
Just remember that DNS changes aren't instant. It can take anywhere from a few minutes to several hours for the update to spread across the globe.
At OneNine, we know a website migration can feel like a high-stakes project. Our experts handle these moves every day, guaranteeing a smooth and secure transition with zero downtime. Let us manage the technical heavy lifting so you can stay focused on your business. Learn more about our website management services.


